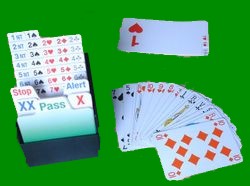
Contract bridge diagram convention
A standard convention has been developed to illustrates hands in contract bridge. The cards are shown with each line representing a suit. If the suit is not explicitly indicated by a prefix consisting of symbol describing the suit (♠, ♥, ♦, or ♣) (also abbreviated 'S', 'H', 'D' or 'C' respectively), the order is, from top to bottom, as follows: spades, hearts, diamonds and clubs. Each card in a suit is indicated by its abbreviation.
'A', 'K', 'Q', 'J', '10' (or 'T'), '9', '8', '7', '6', '5', '4', '3', '2'.
Spacing is used for readability only (thus A K J being equal to AKJ). It is convention to put a card of higher rank always to the left of a card of lower rank, as in the list above. When one hand is void (i.e. has no cards) in a suit, it is usually denoted by a dash (-). The diagram is always drawn with North on top, and other hands as in geographic maps. One or more hands can be left out if irrelevant for presentation. For reader's convenience, in most diagrams South is declarer, so that the reader can see the hand as if (s)he is playing it; exceptions to this rule can occur when reporting deals from actual matches, but even then the players' seats are often rotated to match the common convention.
The following is an example of a bridge diagram:
| ♠ | AK43 | ||||
| ♥ | 862 | ||||
| ♦ | Q10 | ||||
| ♣ | J965 | ||||
| ♠ | 106 |
N W E S |
♠ | Q95 | |
| ♥ | AQ953 | ♥ | K4 | ||
| ♦ | AJ982 | ♦ | K754 | ||
| ♣ | - | ♣ | Q1073 | ||
| ♠ | J872 | ||||
| ♥ | J104 | ||||
| ♦ | 3 | ||||
| ♣ | AK842 | ||||
